TL;DR
I took an old Sega Master System II, the console I grew up with, and converted it into a Retropie case. I wanted to preserve as much of the original look and feel as possible, down to reusing the original internal power switch and pause button. It was a lot of work, required a lot of planning and a lot more trial and error, but it's finished, it works. and it's beautiful. If you want to read more about the why, the what and the how, read on:
Why?
The Sega Master System II was my first ever console. As a young kid in the 90s, my platforms were the Sega and Windows 3.1/DOS. For those who don't know, the Master System II wasn't a sequel console, but a cheaper, stripped down version of the original Master System that only has terrible AUX-out, meaning it looked pretty bad even on a CRT. Nevertheless, I played the crap out of that console and especially the built-in 8-bit Sonic The Hedgehog. That started a lifelong love of games that took me through every Gameboy, DS, PlayStation and Xbox to the present day.
Fast forward to my early 20s and I meet the woman I'd end up marrying. It turns out that not only had she grown up on the Master System II, but she had also played the crap out of the built-in 8-bit Sonic The Hedgehog. We've been playing on my Retropie on and off for a few years now, finishing and completing games that were once impossible challenges - and some still are (damn you Lion King!). I kept the Retropie in the cheapest clear acrylic case Amazon had, with a high-pitched screeching fan to keep it cool, and to be honest that just put me off playing it.
Fast forward to last year and I saw the excellent NES and Mega Drive Retropie cases by Retroflag. I thought they were stunning, but since I had no history with either console I didn't have that drive to buy either. Instead, I decided to buy an old MS2 and gut it to use it as a case.
What?
In principle, it's a simple project:
Buy a Master System II
Gut the internals
Buy some extension cables, and
Stuff them all in.
Points 1, 2 and 3 were surprisingly simple and cheap, at least at first. I bought most of the cables on AliExpress (before Europe made importing from there unviable) and found a Master System II in amazing condition being sold locally.
Point 4 took a lot more work than I expected.
How
I'm going to break down the method into different areas rather than chronologically, simply for clarity.
The Raspberry Pi and extension cables
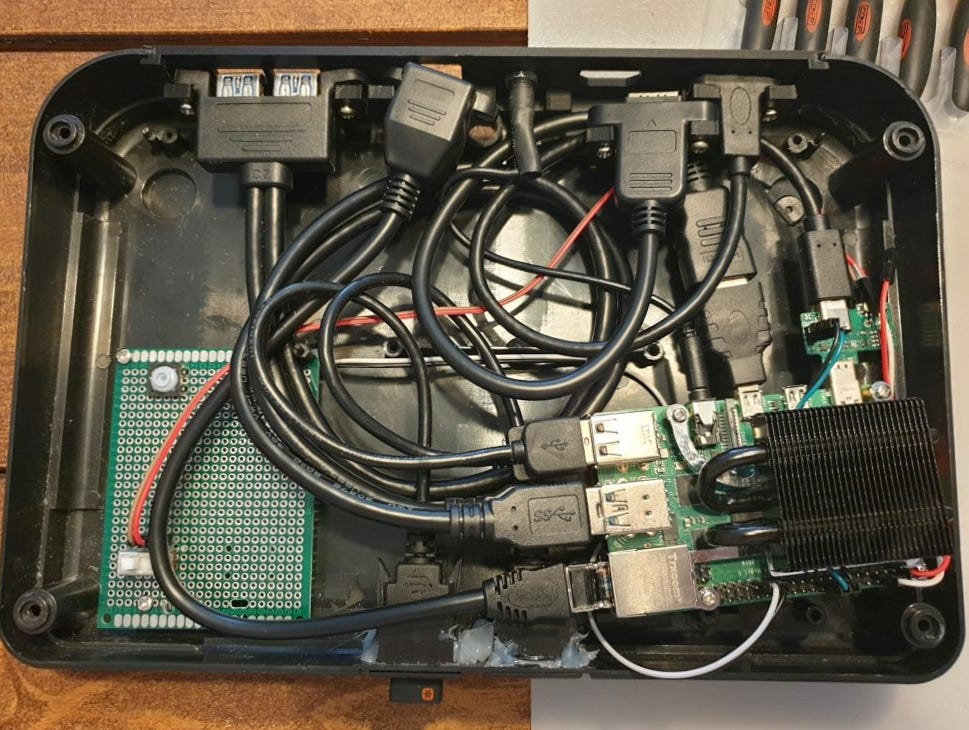
I bought a number of extensions from AliExpress. Each one needed a female end that had some mounting points I could screw/glue onto the backplate. Since I was using a Raspberry Pi 4B, I needed:
USB-C for power
MicroHDMI male to full-size HDMI female converter
USB 3.0 x2 for the back
USB 2.0 x2 for the front controller ports
3 pole audio cable
Ethernet for wired networking
I also picked up a MicroSD extension cable in order to have the memory card externally mounted, but later on decided that that was kinda pointless since I'll likely never upgrade it (it's 128GB) and it added a wide, inflexible cable that I would need to fit into the case.
Keeping it cool
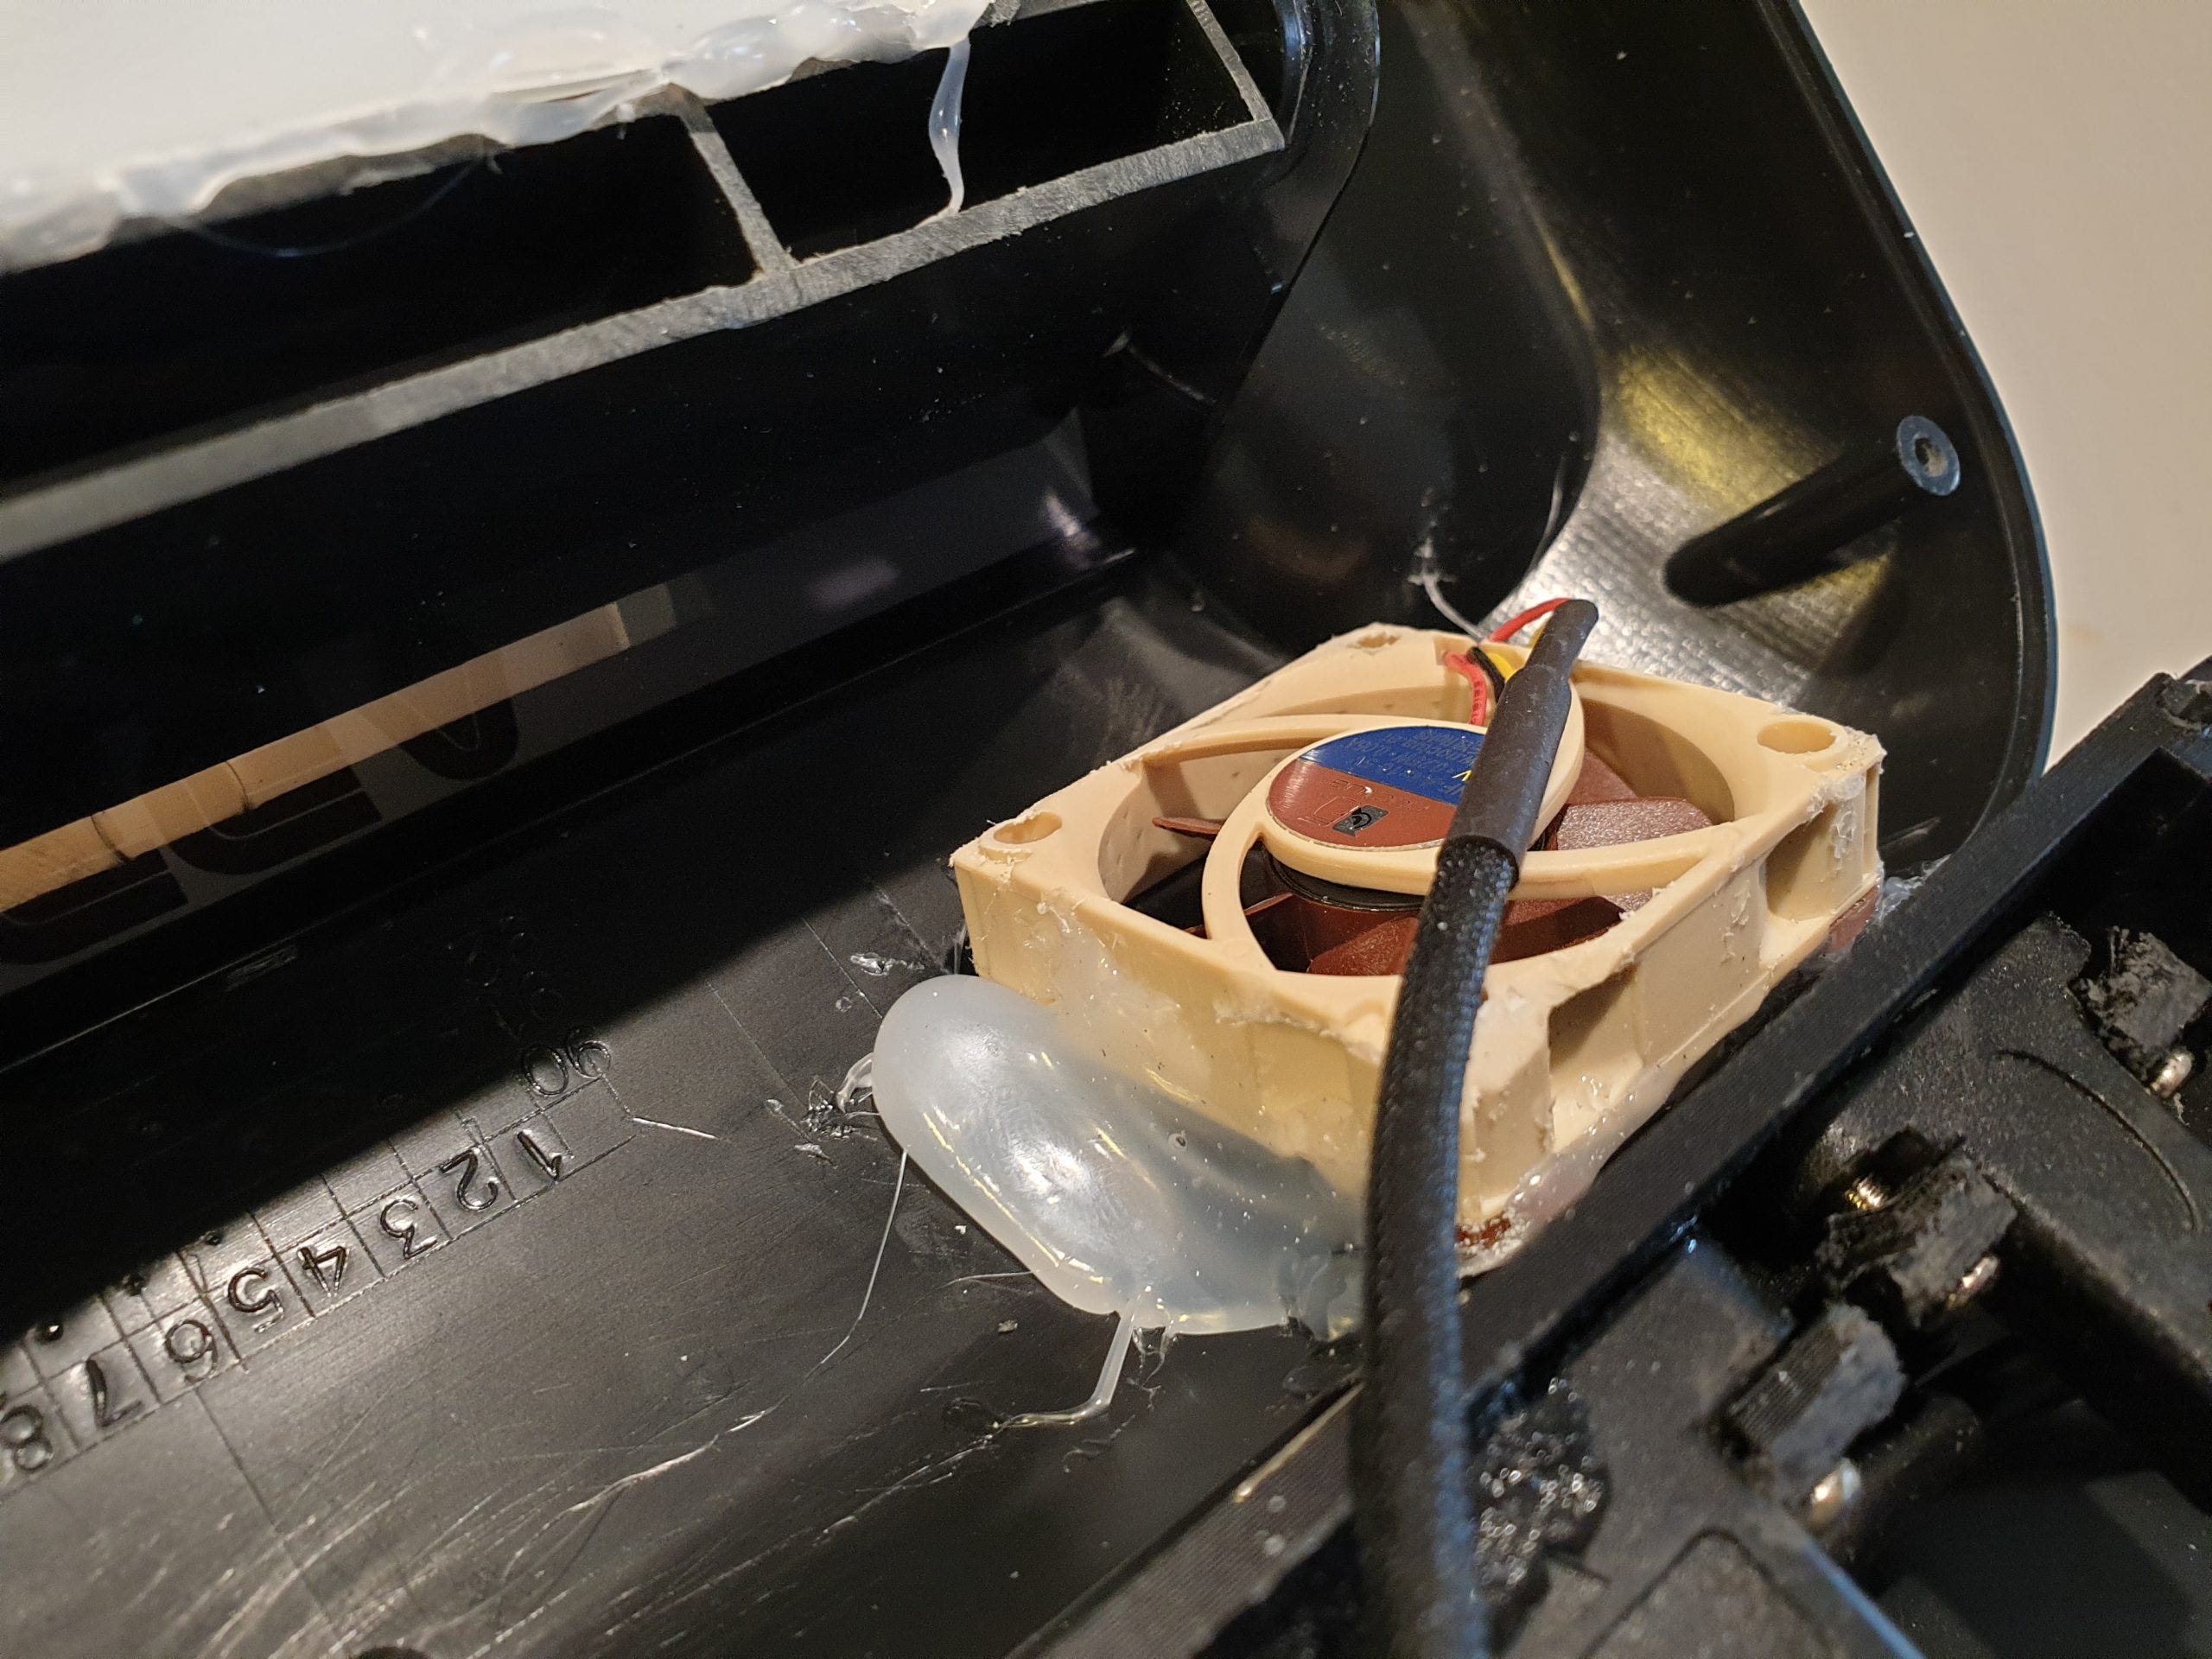
I had some pithy small heatsinks on my 3B that did an OK job, but since I was now putting my 4B in an enclosed space I wanted more volume to absorb and dissipate the heat. That's where I found this PC-looking beast: the GeekPi Ice Tower cooler.

The aforementioned case fan I used for my previous Pi put me off using cheap fans. Plugging it into the GPIO pins let loose a roar that I definitely didn't want underpinning my games, so I decided to do something I've wanted to do for my PC and buy a Noctua fan.
If you don't know Noctua, they pretty much make the best performing PC fans in the world. They have a nostalgic beige colour that will thankfully be hidden inside my Master System, but the speed and quietness of it can't be understated. In the video above I had it plugged into the 3.3V pins, far less than the recommended 5V input for this fan, and it still performed amazingly well in combination with the heatsink. In fact, that 58C idle temperature dropped to 31C! I was astounded.
The only problem with that cooler was that with the fan on top it was so beefy it wouldn't fit inside the shell of the Master System. This would mean one of several modifications to the shell itself.
Modifying the Master System II case
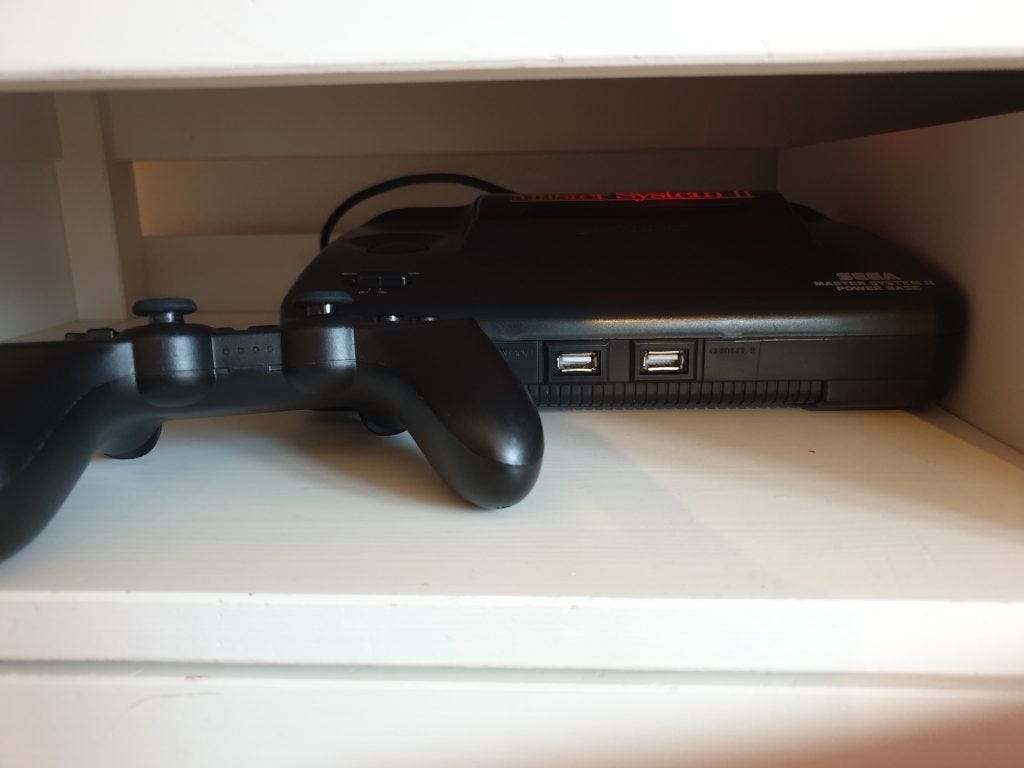
The Master System was kept closed only by 4 Philips screws on the bottom. Once I removed them, this beauty was revealed:
Next, I had to decide how to mount the ports. For the front controller ports the decision was easy. I found a pair of USB 2.0 ports that are meant to slot into a car's dashboard with clips. I simply had to cut out and widen the existing controller port holes on the front.
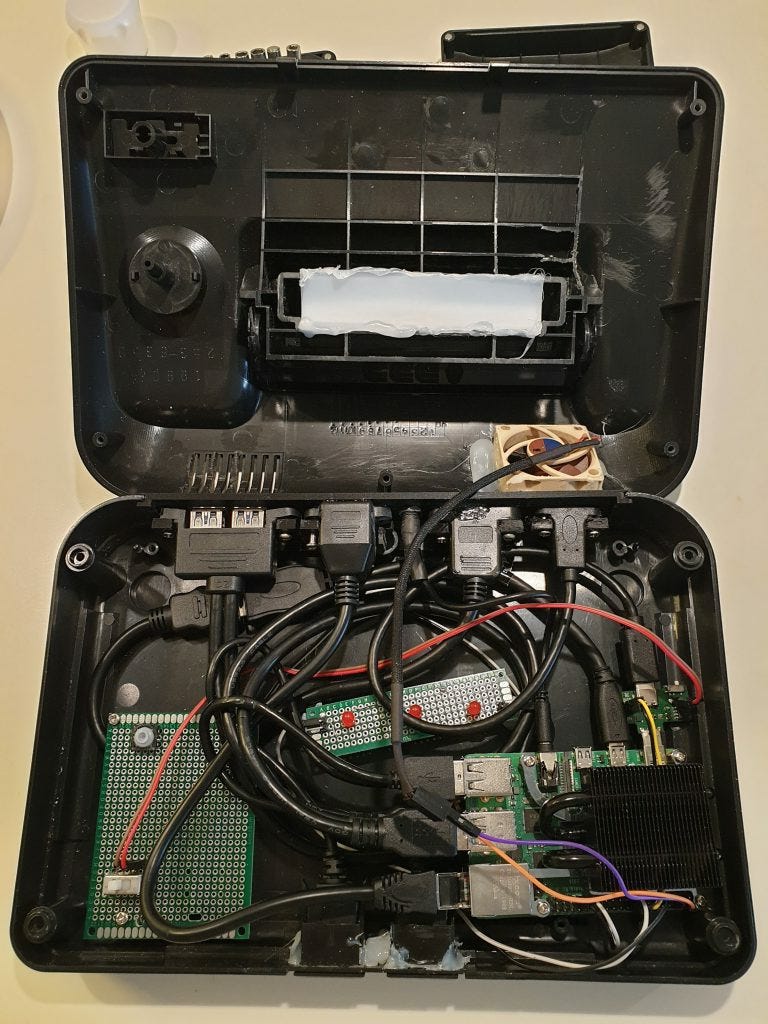
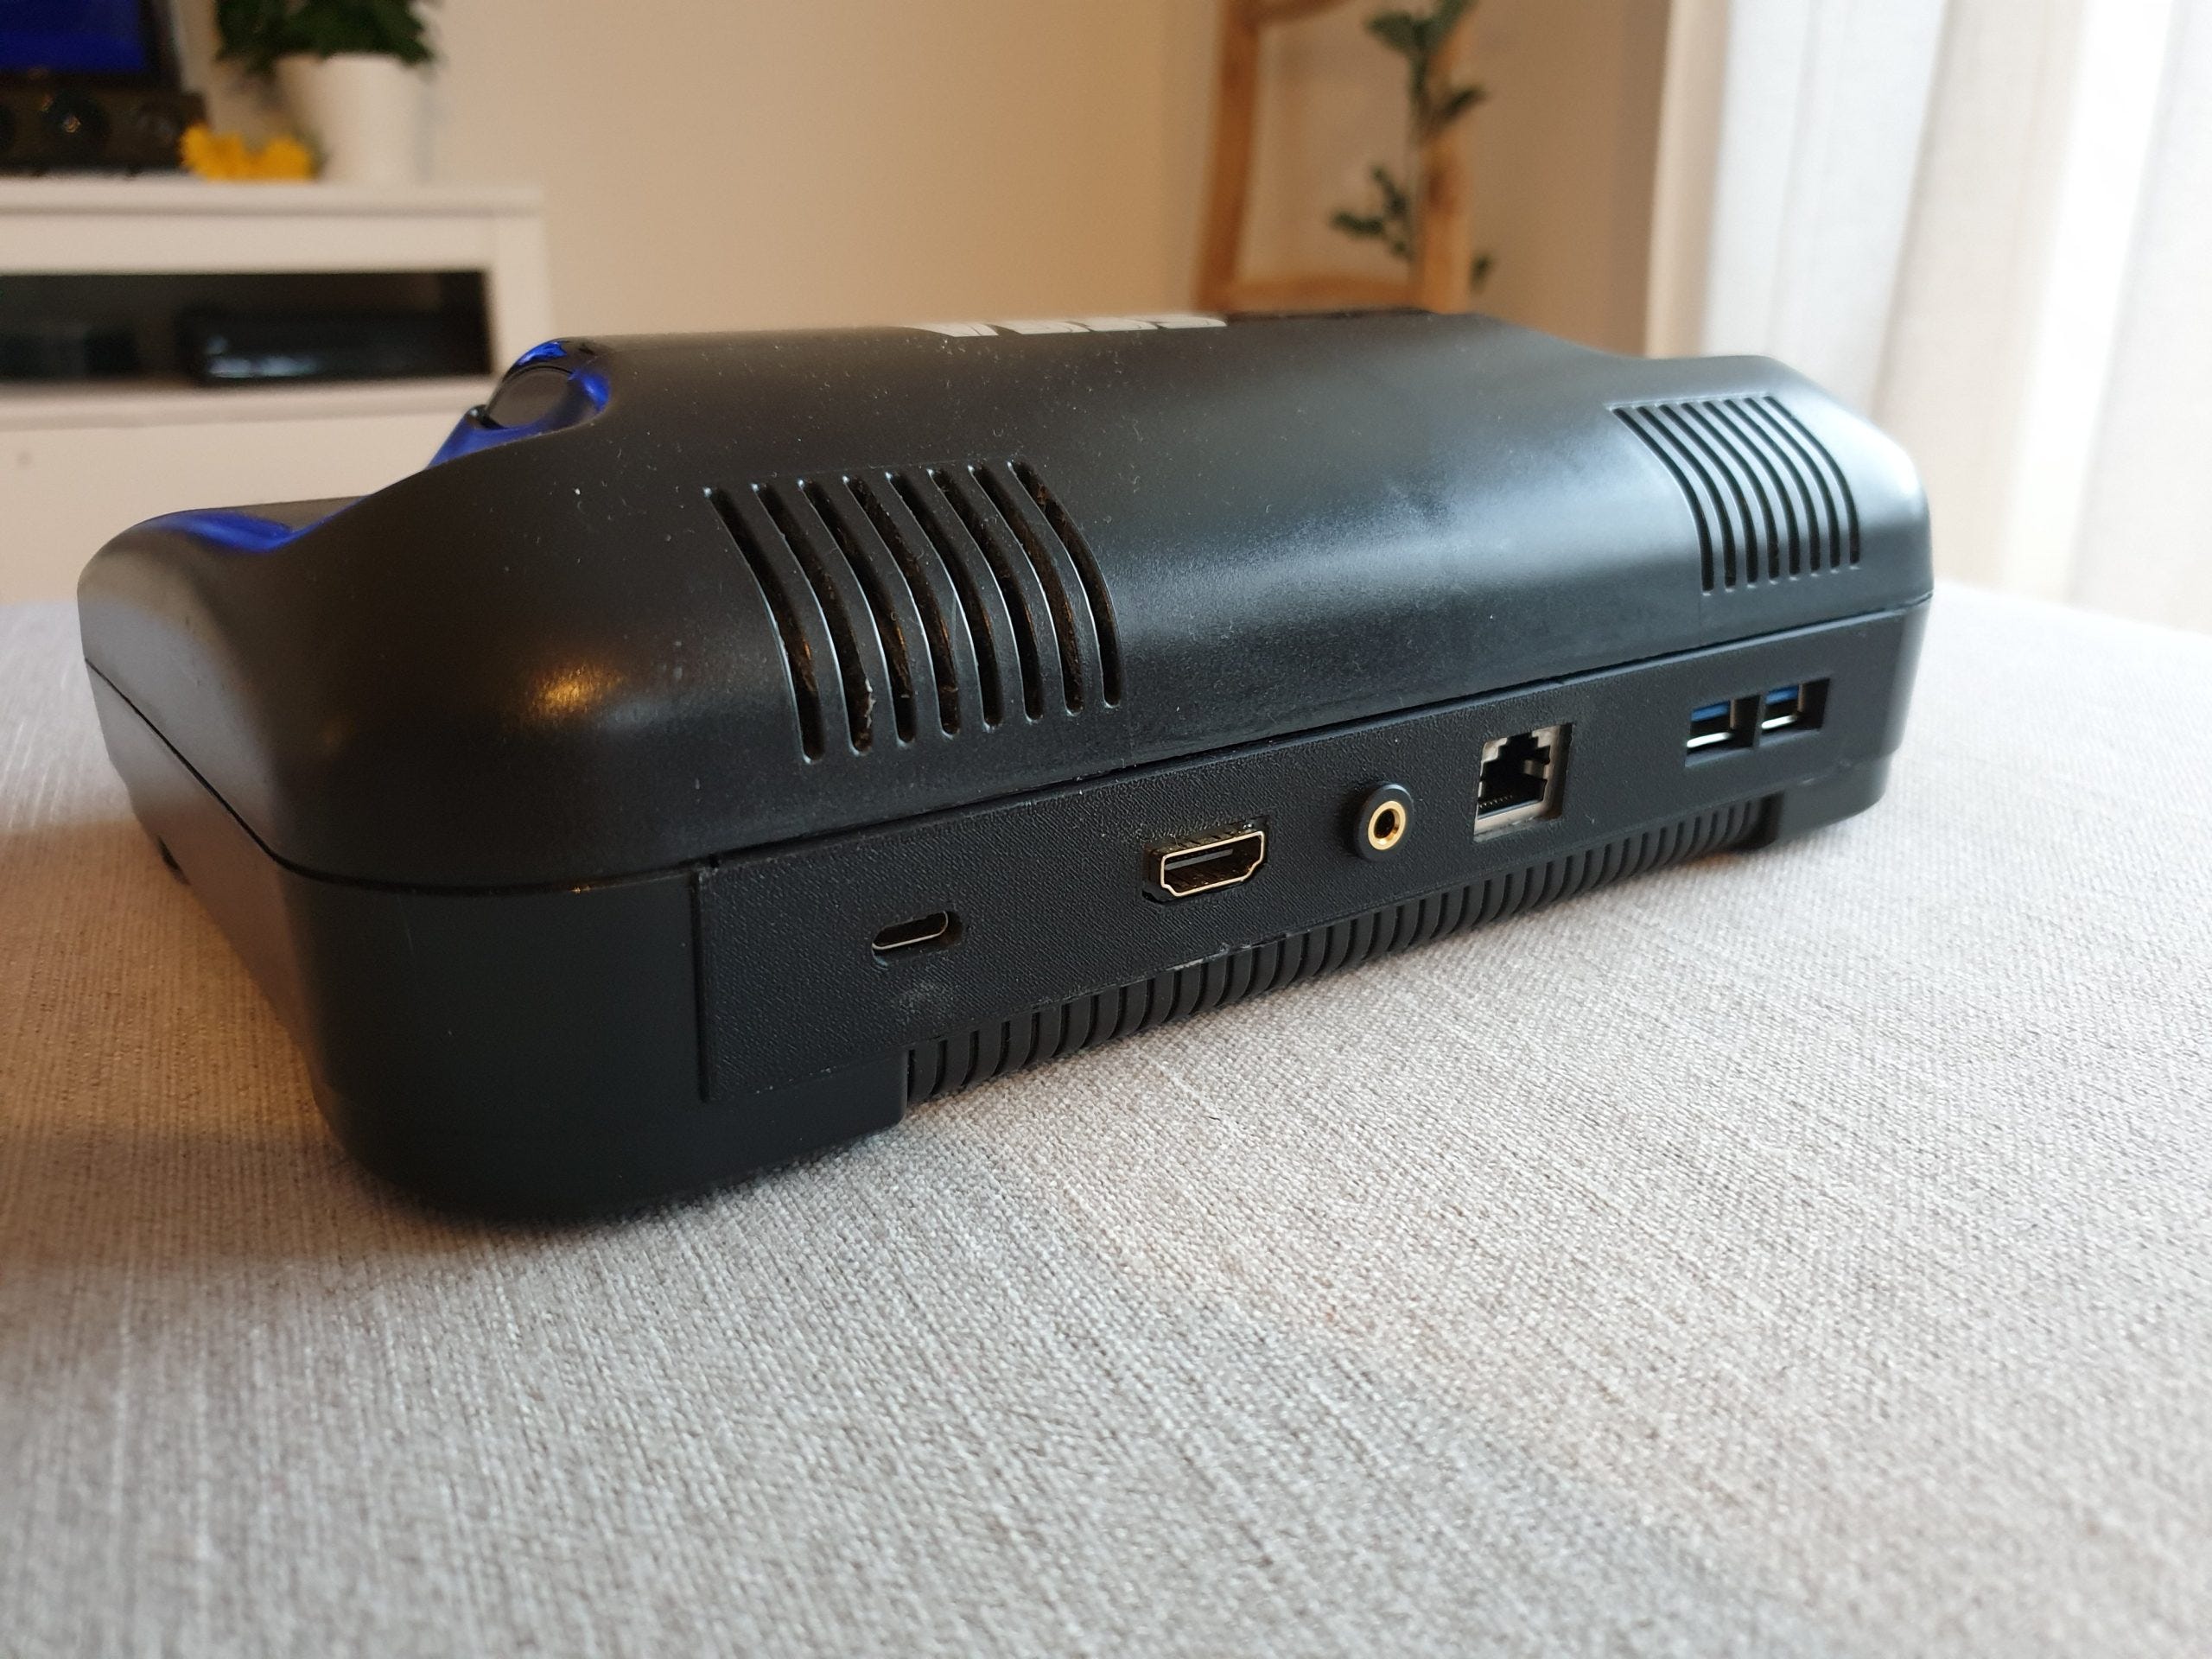
The back was more complicated. My original plan was to cut out the port holes in the existing backplate, but my skills aren't exactly craftsman level and I figured it would look messy and probably scratched to hell by the end. Instead, I tried out 3D modelling for the first time in 10 years.
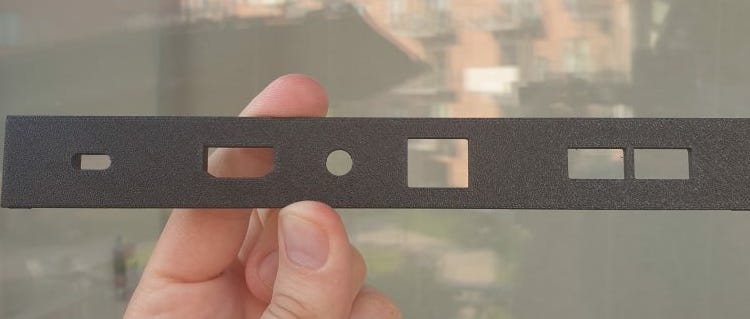
I carefully measured each of my ports and spent a couple of weeks in my spare time designing the final backplate. I included mounting posts for each port with the idea they would slot into place and I could screw them all in. That... didn't go exactly to plan.
I reached out to my local FabLab and somebody was able to 3D print the backplate for me. I included some tabs on either side to grip the existing console structure, and I'm pretty pleased with the final result.
However, the mount posts I designed didn't have enough space to get the port it. All of them needed filing down, some needed removing. But, with some two-part epoxy and some spare screws, everything eventually fit into place. Now I just needed to cut out the entire rear of the lower chassis.
The original Master System 2 has a big, clunky power switch on top that clicks with a resounding thud. After inspecting the motherboard, I figured I'd try my first ever desoldering and remove the switch from the motherboard.
While I was at it, I took the old Pause button too! Not that I've found a use for that yet 🤔
Squeezing it all in
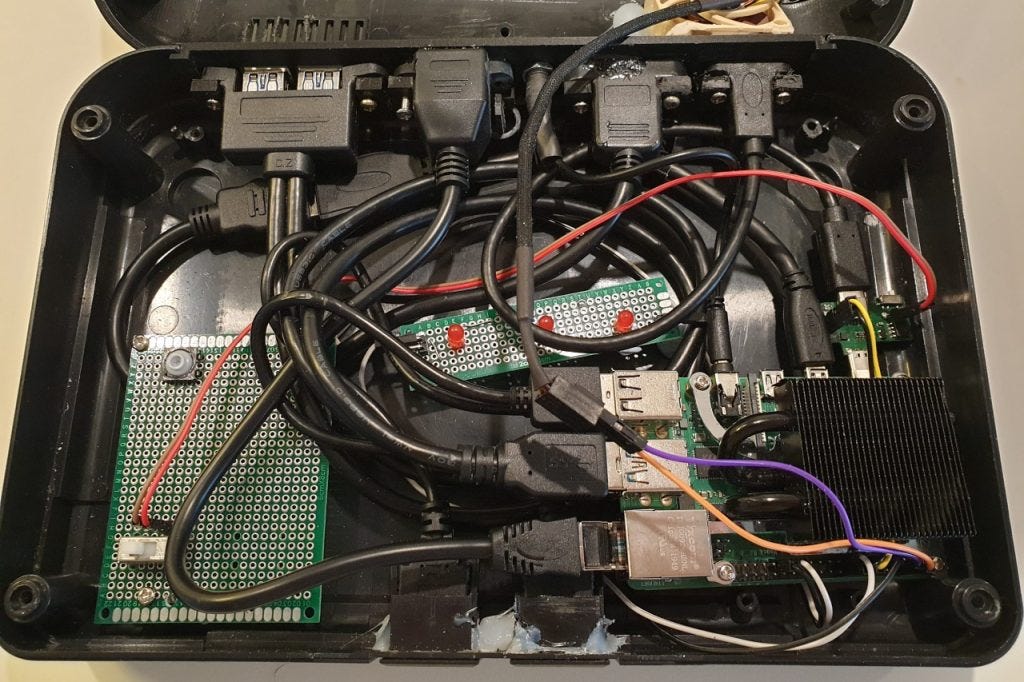
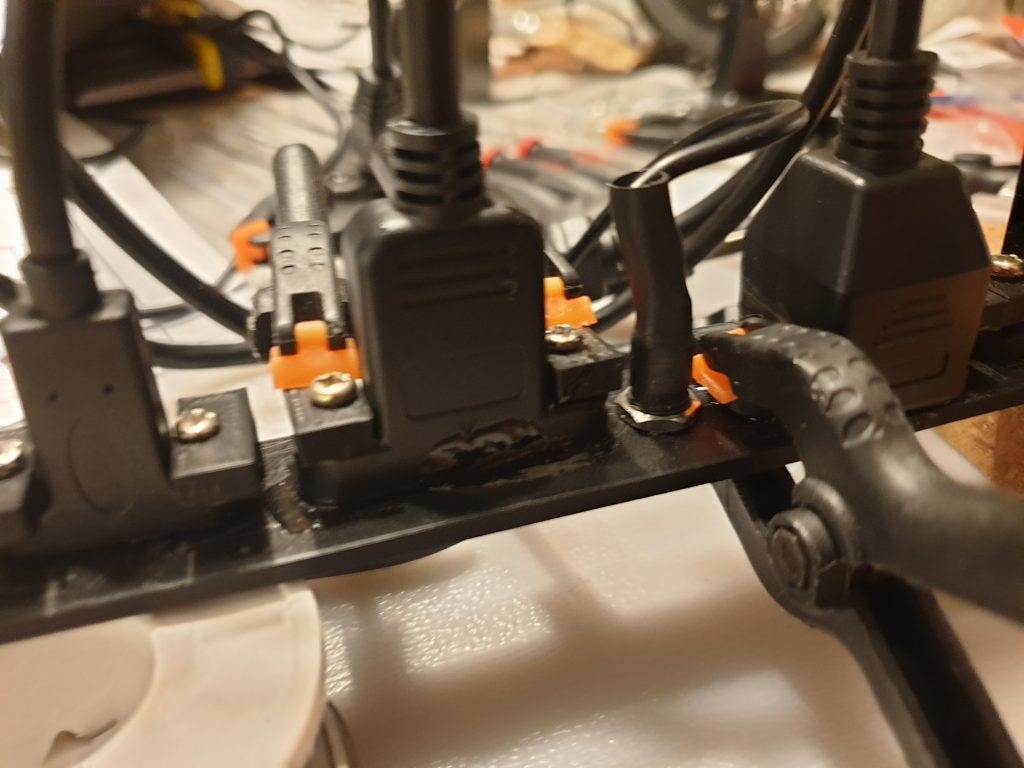
Once I put everything together, I had a rat's nest to contend with.
I weaved some cables under others and twisted them all into loops to get them to fit. Two cables were eventually pinned underneath my power switch board, and I even removed the release clip from the ethernet cable so it wouldn't push down on the front USB ports!
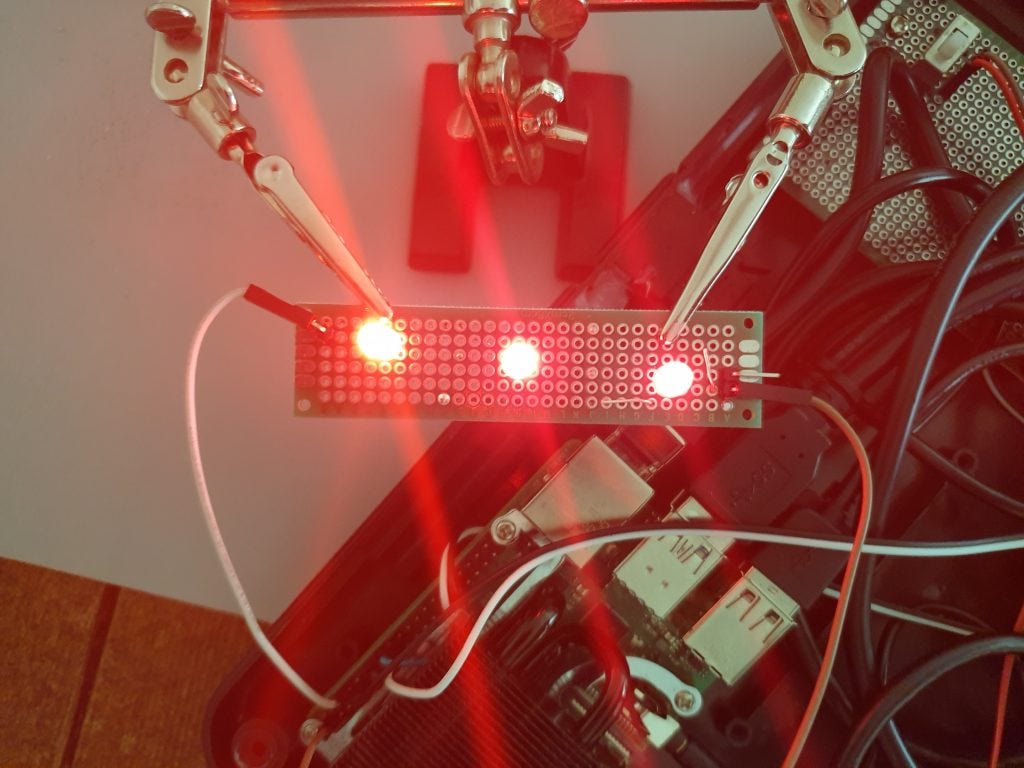
Then, for purely troubleshooting reasons, I made a small LED board that I plugged into the 3.3V pin. The problem was that once the console was closed up I had no visual way of knowing if it was turned on or not. So I took some red LEDs and make a board that would shine through the translucent cartridge slot cover when the retropie was turned on.
Shout out to Mausberry Circuits for the excellent power board I bought for this project! It allowed me to solder any switch to turn on and power off the retropie without pulling the power cable, which is what I'd been doing for years before this.
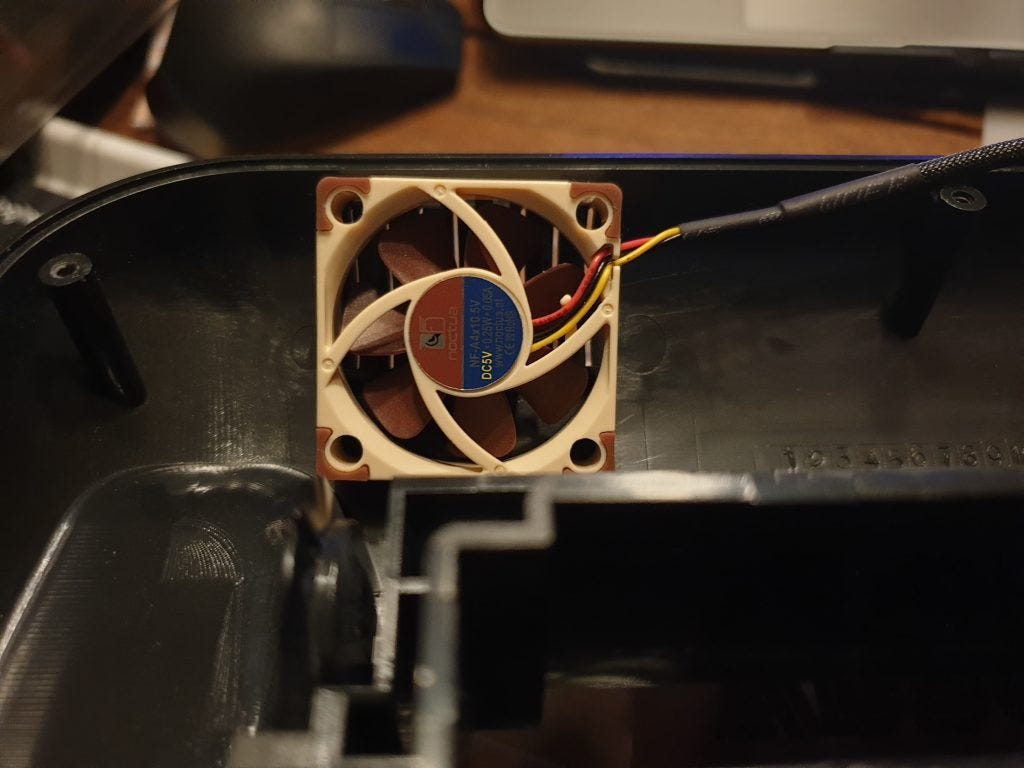
The final component was the Noctua A4x10. Since I couldn't mount it on the cooler, I decided to attach it to one of the air grates on the upper shell. I filed away the plastic grating on the top side of the console and hotglued the fan inside. I had to file away some of the fan housing itself in order to secure it inside without interfering with the opening of the cartridge slot, but eventually it went in smoothly and holds surprisingly well.
The Result
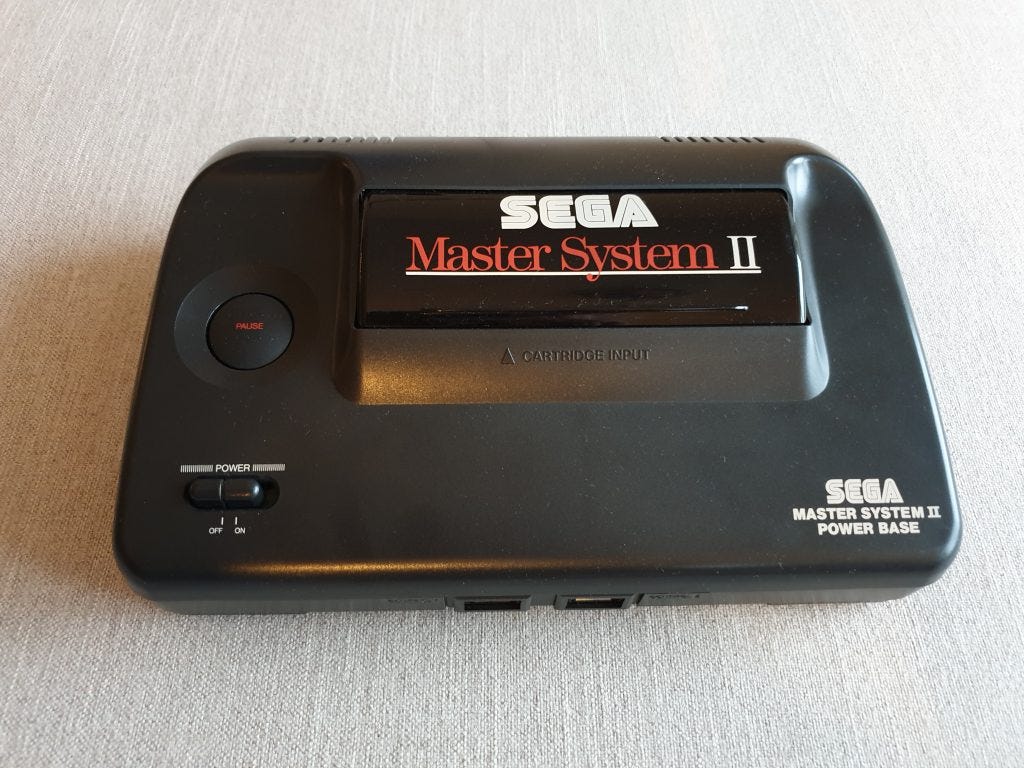
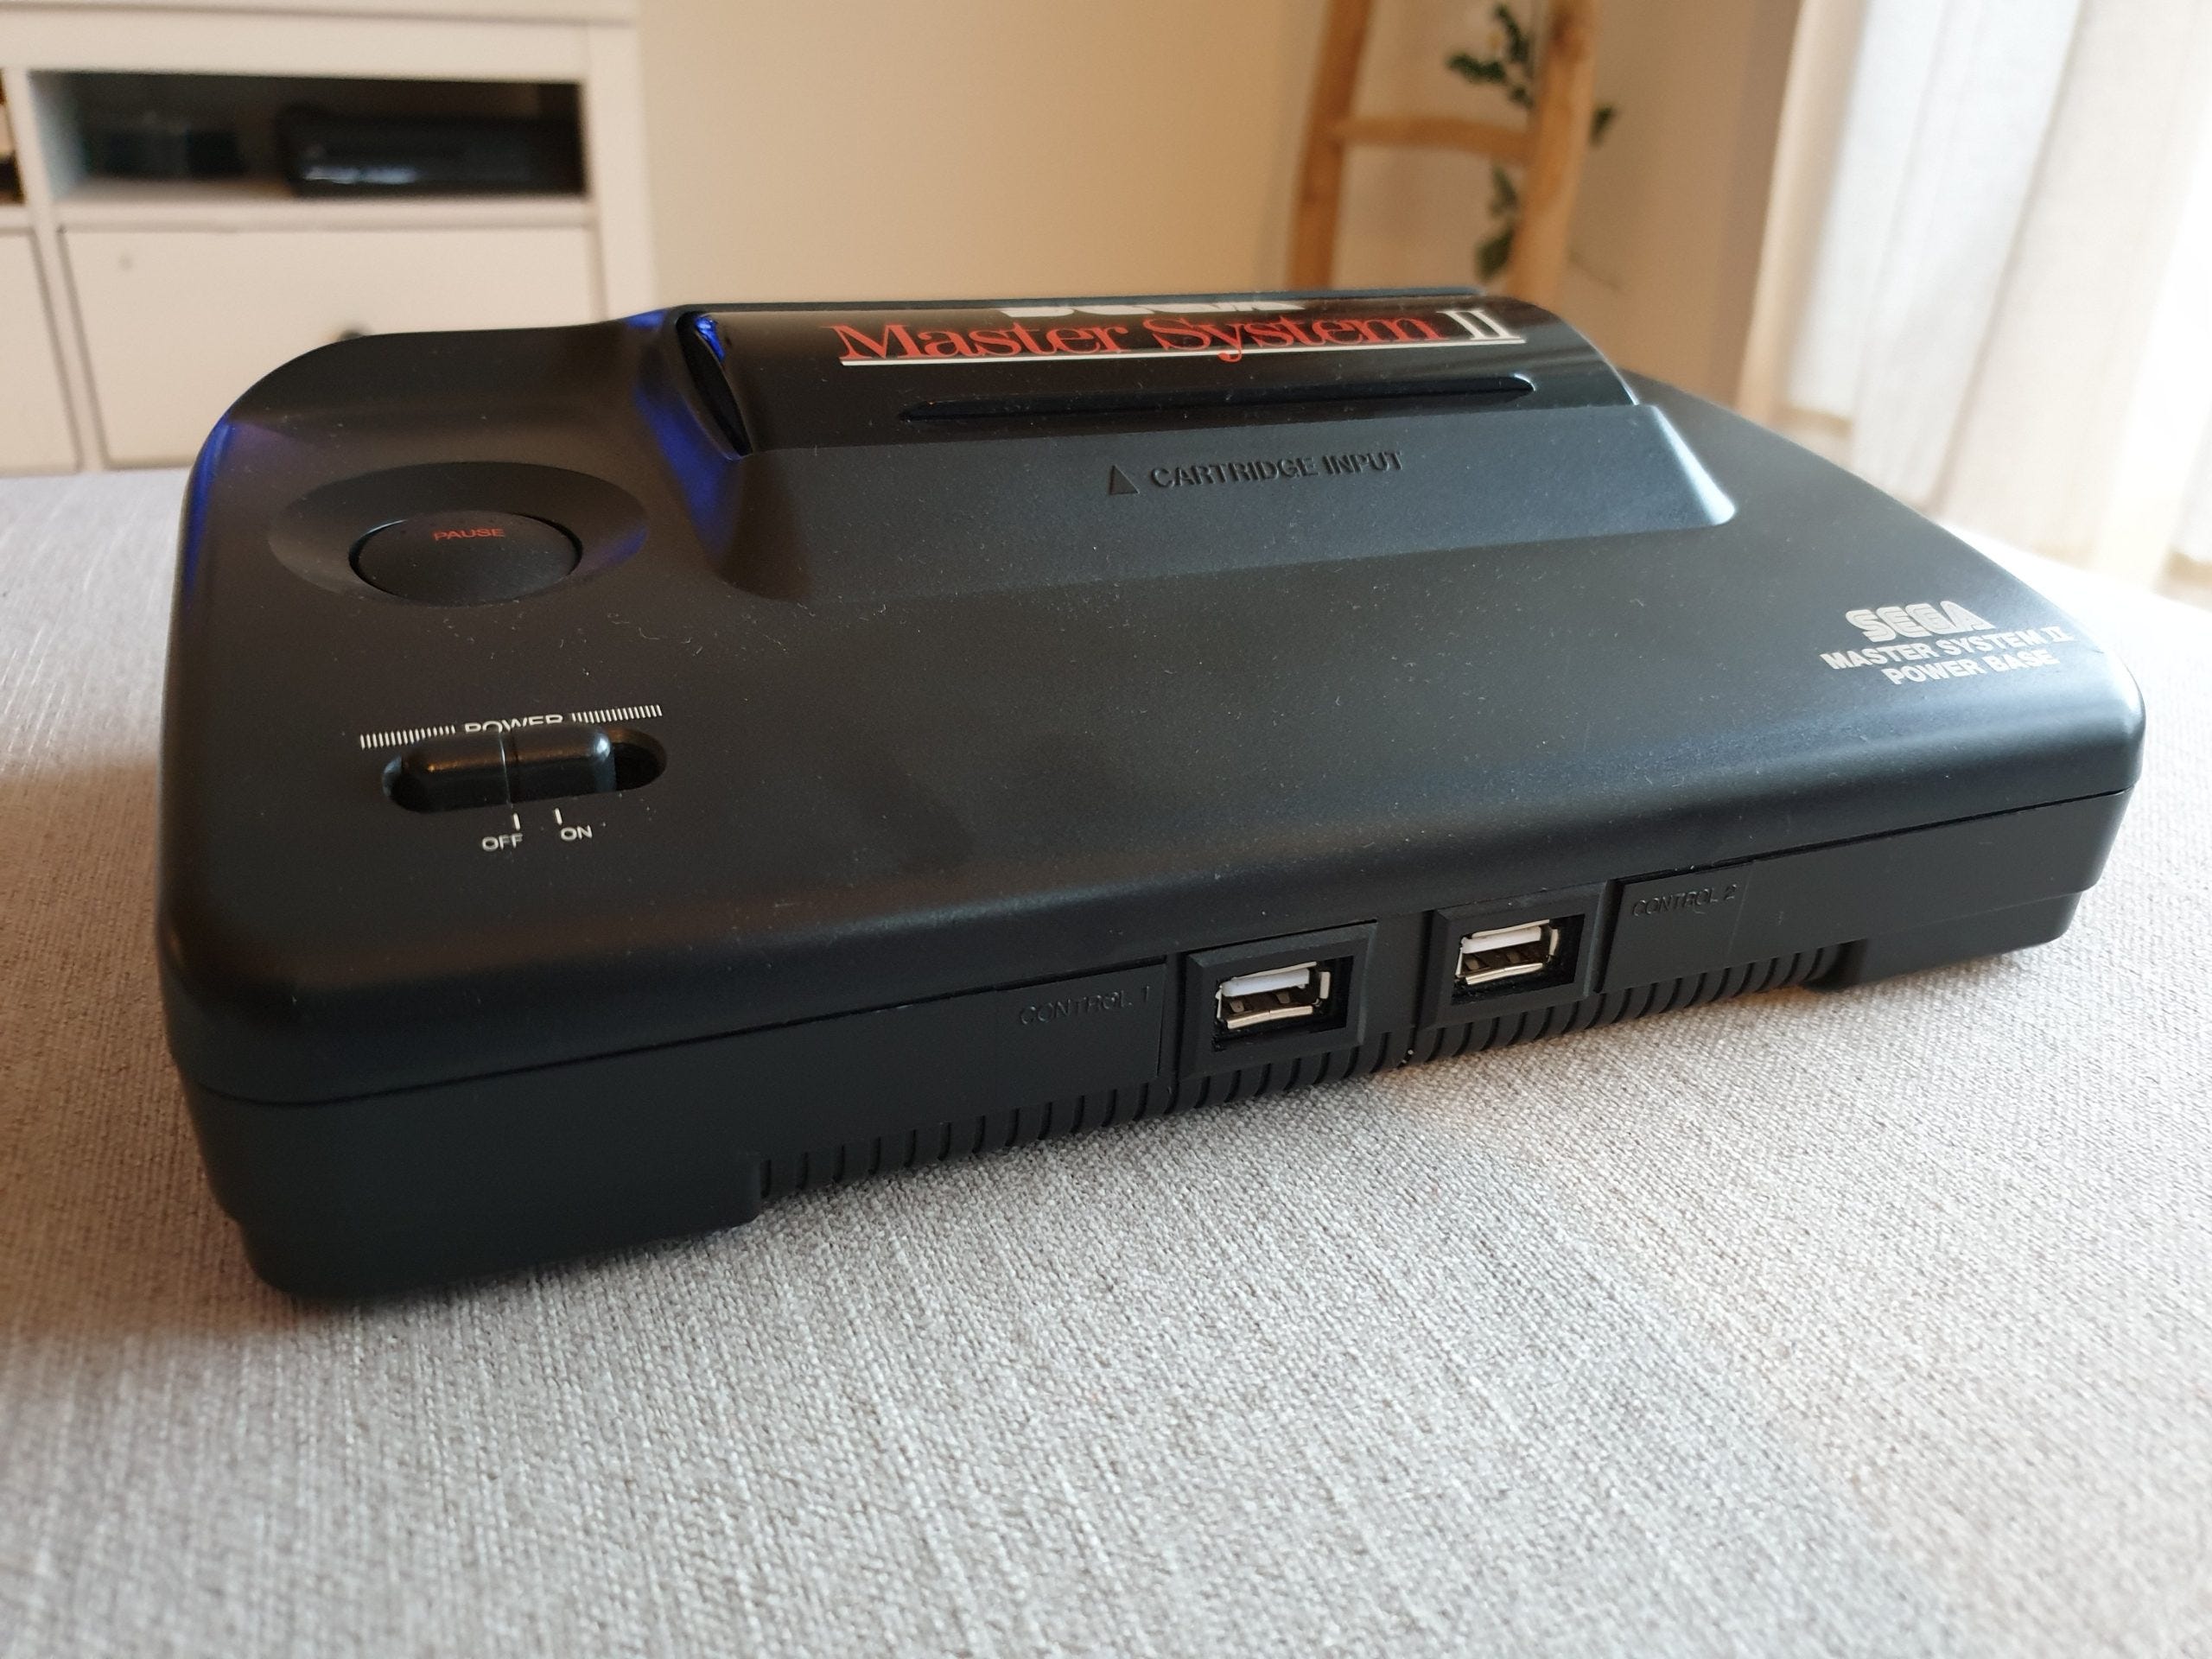
It's not a perfectly neat or tidy result, but it achieves everything I wanted to. The ports all work correctly, the console looks gorgeous in the TV stand and it's a real joy to turn it on and off and feel that same hefty clunk I felt 30 years ago. Its a retro piece of equipment that works well for modern emulation and I absolutely love it!